Things to Consider When Buying a Home: A Step-by-Step Guide


Whether you are a first-time homebuyer or a current homeowner looking to trade up to a larger home or downsize for retirement, the process can be challenging to navigate without a roadmap.
To help lower the stress of buying a house, we’ve prepared a helpful list of key steps most buyers should think about.
Along the way, consider that there are benefits to working with experienced professionals such as real estate agents, personal bankers, mortgage brokers and insurance agents who can help guide you in your decisions.
Let’s get started!
Step 1: Establish how much home you can afford
A key step in the homebuying process is determining your price range. Here’s a simple way to approach it: start by adding up your total monthly take-home income and then subtracting all of your non-housing monthly expenses. Consider that what money is left could be applied toward the down payment for your new home, but understand that you may need to save more.
Next, determine your debt-to-income ratio. This is an important factor for mortgage lenders in determining your eligibility for a home loan. To do this, add up your monthly debt payments and divide them by your gross monthly income.1 If your debt-to-income ratio is higher than 25%,2 lenders may deduce that you’re carrying an unsustainable amount of debt. In this case, they may be less likely to extend you a mortgage loan, or they may require a higher down payment amount and/or charge you a higher interest rate.
Quick tip: Lowering your debt before you buy a home may help you get more favorable mortgage interest rates.
Remember, there are many costs associated with homeownership that should be factored into your price range for a new house. These include:
- Mortgage payment — The principal and interest you pay to your lender.
- Property taxes — The money you may have to pay to your city, county and state to support schools and public services.
- Homeowner association fees — The fees you may have to pay if you live in a condo, co-op or home with a neighborhood association.
- Utilities and maintenance — The costs to maintain and repair your home, as well as fees for utilities like water and electricity.
- Closing costs — The additional fees paid to cover the legal costs of buying your home.
- Homeowners insurance — The cost of insurance to help you cover costs of property loss and damage in the event of theft, fire, storm and other potential covered risks to your home and possessions.
Home insurance costs will depend on factors like where the home is located, its age and condition. Remember to include insurance premiums when you estimate the monthly cost of the home you wish to buy.
Step 2: Save for a down payment and apply for a mortgage loan
A down payment is money that you pay upfront toward the purchase price of your home. The larger your down payment, the lower your total debt. Most lenders are looking for at least a 20% down payment.
If you must put less than 20% down, lenders who are willing to work with you may require that you hold private mortgage insurance (PMI) and pay a higher interest rate. Typically, the mortgage insurance fee is added to your monthly mortgage payment and is required until you achieve 20% equity (ownership) of your home.
Quick tip: When you’re shopping for a home, get pre-approved for a mortgage. Your lender can provide you with a pre-approval letter indicating your potential loan amount and their proposed interest rate. This will give you the price range of homes you’re qualified to purchase.
Step 3: Define your needs and wants
Understand the difference between needs and wants when looking at potential homes:
- "Needs" are the deal-breaker attributes that you can’t live without, such as a particular layout, location or essential characteristics that would be difficult to change after you move in. For example, a family may need a certain number of bedrooms and a neighborhood within a good school district, while a retiree may need a one-level layout.
- "Wants" are attributes that could be achieved after you move in. For example, you may want a home with a fenced-in yard. As long as you don’t move into a neighborhood with a homeowners association that prohibits fencing, you can meet that “want” later on.
Separating your needs from your wants can help you save time in the house-hunting process. It also helps keep emotional thinking from steering you toward a home that may not be the best fit.
Step 4: Start your official search
Do your research. Go to open houses, look at listings online, and learn about the neighborhoods and homes in your price range. Buying a home can be a significant commitment with life-changing implications. Putting in the time and effort at the beginning to identify your needs (and the range of home listings that meet them) can be well worth it in the end when you have found the perfect home.
In addition to finding listings that suit your needs, a professional real estate agent can serve as an objective advisor and sounding board. They also can guide you through the negotiation process. If you’re unsure where to find a good real estate agent, ask friends or family members for recommendations. A study from the National Association of Realtors® shows that more than half of all homebuyers found their realtor through a personal recommendation.3
Quick tip: Consider hiring a Realtor®, which is a professional designation for real estate agents who are members of the National Association of Realtors® (NAR). NAR members subscribe to a strict code of ethics for real estate professionals.
Step 5: Tour as many homes as you can
Give yourself the time with your real estate agent to explore a variety of homes that meet your list of requirements. This can help you get a sense of how much house you can afford, as well as give you a feel for different neighborhoods. Take advantage of online listing sites to see how housing prices may vary depending on the neighborhood, and to narrow down your list of properties to view.
Quick tip: Many listings offer digital photo galleries and virtual tours that allow you to tour a house for sale from the comfort of your current home.
Step 6: Make an offer
Consider the local real estate market and local homebuying and selling trends before you make an offer. If the housing market is competitive, you may need to make an aggressive offer to head off the competition. In a less competitive market, you may want to bid lower in hopes of compelling the seller to negotiate. Your real estate agent can be a strong ally in helping you negotiate appropriately for the situation.
If a seller accepts your offer, you’ll be under contract with the seller. Typically, during this time, the seller agrees not to take other offers while you move forward with the home inspection and appraisal process. You also may be asked to put down earnest money or a good faith deposit equal to 1% to 2% of the sale price. That money is held in an escrow account and later can be applied toward the purchase price of your new home.
Step 7: Inspect your prospective home
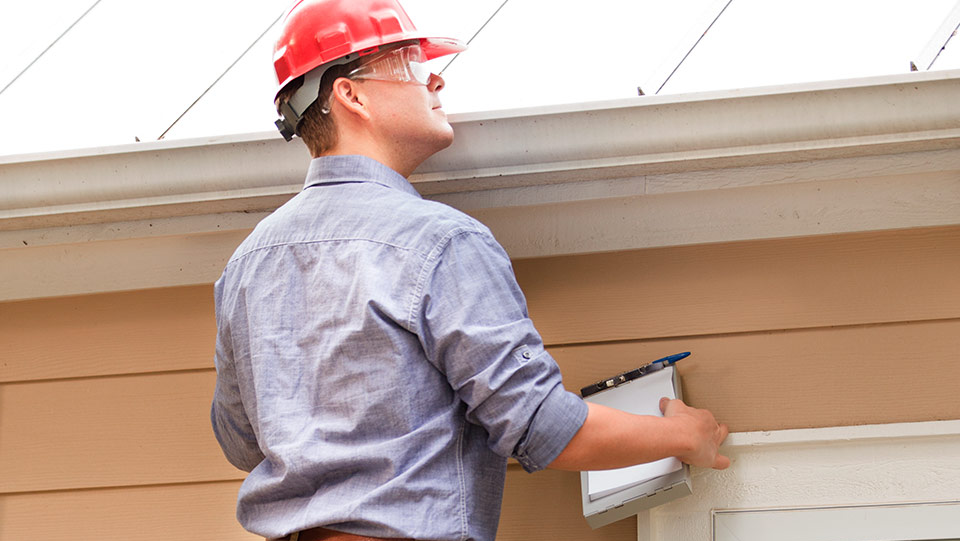
Once your offer has been accepted and earnest money is in escrow, your realtor can help you schedule a home inspection. The inspection should be done by a professional who performs a top-to-bottom assessment of your prospective home, which may include:
- Electrical systems
- Roof and drainage
- Lawn and property
- Plumbing and sewer
- Structural issues
- Insect infestation or termite damage
- Heating and cooling
Quick tip: Ask your home inspector for a punch list of issues you may want addressed before closing the purchase, or for which you may want to use to negotiate a lower purchase price and fix yourself after closing.
Step 8: Finalize the loan
Once your offer is accepted, finalize your loan with your mortgage provider. Mortgage lenders typically require a list of documents such as pay stubs, W-2 forms or your previous year's tax return to help them confirm your eligibility. These documents allow the underwriter to confirm your income and determine if you’ll be able to make your monthly mortgage payment.
One of the documents you’ll need is proof of homeowners insurance. Your lender can tell you the minimum amount of home insurance they require you to have on your new home.
Quick tip: Share your moving timeline with your insurance agent to help get a home insurance policy in place before closing.
Step 9: Get the home appraised
As a part of the mortgage loan approval process, the lender will request an independent appraisal of the property. The lender does this to assess the difference between the home’s sale price and its apparent value. The appraisal ensures that the lender isn’t lending you more than the property is worth.
Typically, the lender arranges the appraisal through a licensed appraiser and you are responsible for the cost. The appraiser may need access to the home, which is arranged with the current owner. Some lenders may require buyers to include an appraisal contingency as a part of their offer. That means that if the home appraises for less than the amount you have agreed to pay, you can back out of the contract.
Step 10: Negotiate, negotiate, negotiate
Once the inspection and appraisal are approved, you can go back to the current owner to negotiate the price. You may ask them to adjust the price based on the results of the appraisal and the inspection. You can also ask them to repair issues that were uncovered during the inspection. The owner may choose to make repairs or offer to lower the sale price so you can take care of them yourself. Bear in mind that the owner is not obligated to do this, so you may want to consider your next move if that’s the case.
Step 11: Close the sale
If everything goes smoothly, you typically should be able to close the transaction in about 45 days from when your offer was accepted.4 By the closing date, you should have negotiated a final price with the current homeowner, gotten final approval for your mortgage loan and performed a final walk-through of the house.
Typically, on closing day, you’ll need to bring all the necessary documents, including proof of insurance, a copy of your contract, inspection reports, a government-issued photo ID and other paperwork requested by the lender. You’ll meet with the seller and an attorney or settlement agent who will guide you through the process. When you’re done, you’ll be given the house keys and be able to move into your new home.
You officially own the home... now protect it!
Homeowners insurance is an essential part of the homebuying process. The right coverage can help protect you from the potentially devastating costs of damage caused by things like fire, theft and extreme weather.
Ready to insure your home? Learn more about home insurance from Travelers.
Quick tip: Download this handy step-by-step First-Time Homebuyer Checklist.
Sources
1https://www.consumerfinance.gov/ask-cfpb/what-is-a-debt-to-income-ratio-why-is-the-43-debt-to-income-ratio-important-en-1791/
2 https://www.amwestfunding.com/Debt-to-income-Calculator
3 https://www.nar.realtor/sites/default/files/reports/2017/2017-home-buyer-and-seller-generational-trends-03-07-2017.pdf
4 https://www.zillow.com/home-buying-guide/how-long-does-it-take-to-close-on-a-house/


